What do you get the dad who has everything for Father's Day? He probably doesn't want any more socks or novelty ties and as everyone knows the way to a mans heart is through his stomach, a cupcake or two is always going to go down a treat. At Print Cakes we have three special Father's Day Cupcake Gift Boxes on offer this year with cool designs your dad will love. They can be delivered any where in the UK and come in a gift box with a ribbon tie. If you're feeling creative though, we have an amazing Father's Day cupcake tutorial for you below:
Cute Father's Day Cupcakes


Materials and Tools Needed

Serves: Makes 12 Father's Day Cupcakes
Total Time: 120 mins
Ingredients:
- 500g Sugar Paste
- Cupcake batter (here's a cupcake recipe for you)
- Buttercream (here's our buttercream recipe)
- Edible Glue (or just some water)
- 500g Sugar Paste
- Blue Gel Food Colouring
- Sharp knife
- A bowl and teaspoon
- Ice-cream scoop
- Small brush
- Cocktail stick
- Rolling pin
- Quilting wheel tool
- Set of circle cutters
Let's Get Started!

Step 1:
Preheat the oven to 175°C. Line your cupcake tin with your cases and get your cupcake batter ready.


Step 2:
Place a scoop of cupcake batter into each case. The cupcake cases will be about two thirds full. Don't worry if you don't have an ice-cream scoop, a spoon will do fine, it just might be a bit more messy!


Step 3:
Take out the cupcakes when golden on top and bouncy to a soft touch. Place on a wire rack to cool.
While the cupcakes are cooling, make up a batch of buttercream.

Step 4:

Step 5:
Colour about 300g of the sugar paste a light blue (or whatever shirt colour your dad likes best!) Add a small amount of the gel colour at a time with a cocktail stick until you get the colour you are looking for. Roll it out until it is about 5mm thick and use a 60-70mm round cutter to cut out your circle.


Step 6:
The blue circle will make the base for the shirt cupcake of your Father's Day set. Place the blue icing circle on top of the buttercream on the cupcake. If it looks a little small, take it off and give it a gentle stretch. It's a bit of trial and error with the first one, but you'll be a whizz by the 12th! Lightly pat the circle down slightly, then start to move the edges of the circle closer to the cupcake case. Work your way around the cupcake and you should end up with a nice dome. Don't worry if you don't get it right the first time, practice makes perfect!

Step 7:
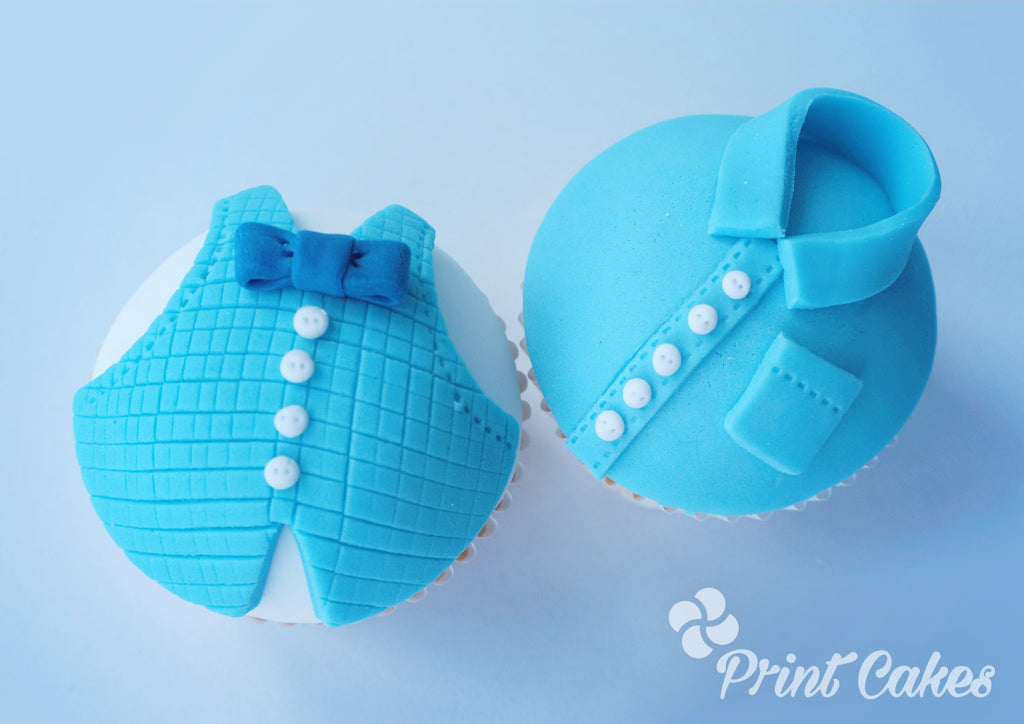
Next we will make the details for the Father's Day shirt cupcake. Roll out some more of your light blue sugar paste, this time you only want it 1-2mm thick. Cut a thin strip about 80mm long and about 10mm wide, this will form the collar. Next cut a strip about 40mm long and about 5mm wide. This will be the strip under the shirt buttons. Next you will need a small square to make the pocket.
If you have a quilting tool you can run it along the edges of the button strip and the top of the pocket. If not, you could use a cocktail strip to make little stitch marks.
Finally roll some tiny white sugar paste balls to form the buttons.


Step 8:
Glue the one long edge of the collar piece with some edible glue or a bit of water and curl it to form the collar as in the image above. Next glue on the button strip and the pocket. Finally add each button and use the cocktail stick to make two small holes on each one. You have finished your first shirt cupcake!

Step 9:
Next we are making the waist coat cupcake. Repeat steps 4-6 with some white sugar paste to end up with a white dome as in the image above.


Step 10
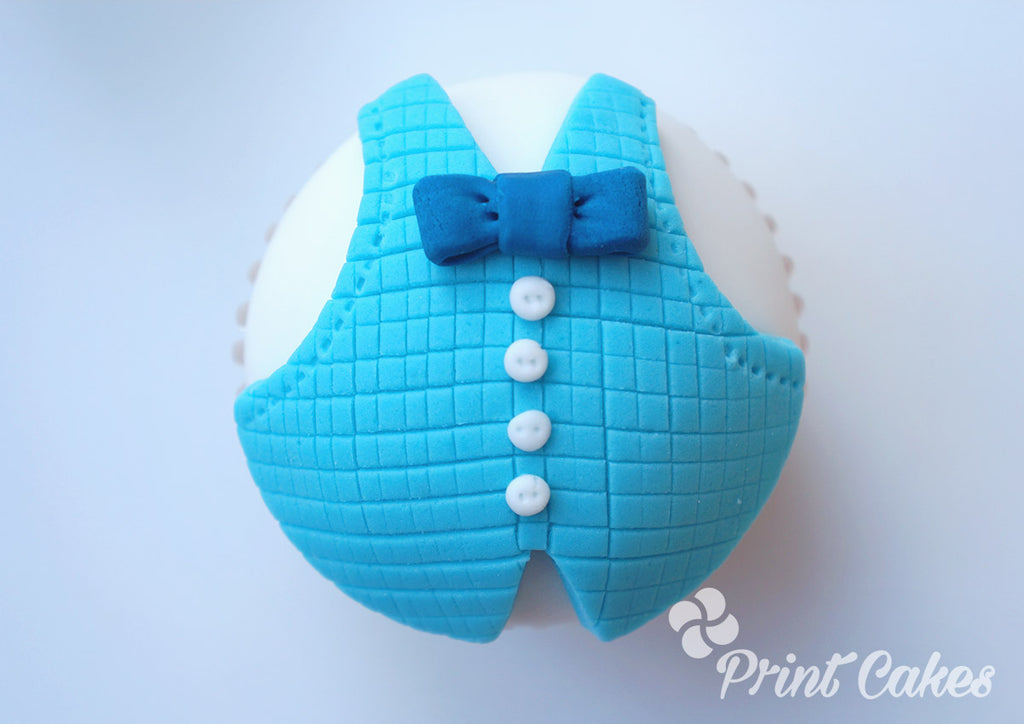
Roll out more of your light blue sugar paste to about a 3mm thickness. Use a sharp knife to make a criss-cross pattern on the icing. This will give the waist coat some texture. One you have done it, use the same size cutter you used to cut out the dome to cut a new circle out.


Step 11
Use a smaller circle cutter (40-50mm) to make two cuts for the arm holes. Then using a knife, cut a small "V" from the top and bottom as in the image above.

Step 13
Glue the waist coat onto the white cupcake dome. In the same way you added the buttons to the shirt cupcake, add 4 small buttons and use the cocktail stick to make the holes. To add some "stitched" edging to the waist coat, use your quilting tool, or the cocktail stick.


Step 11
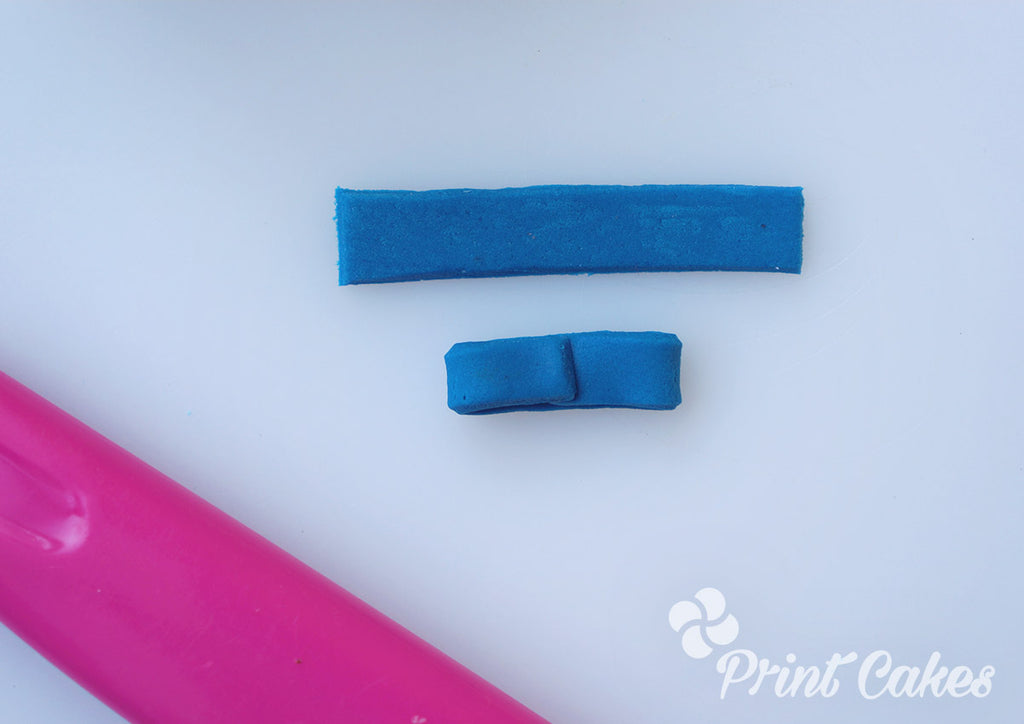
For the final step, colour some sugar paste a darker blue or a nice colour to make the bow tie pop! Cut out a strip around 40mm long and 4mm wide. Dab some edible glue in the centre and fold each side in (see top left image). Add a smaller piece around the middle to form the "knot" and use your cocktail sticks to make two "crease" indents on each side. And you're done! Well almost, you've got another 5 waist coat cupcake to make, but I'm sure your dad won't mind if you just make him one of each and eat the rest!

We hope you enjoy this Father's Day Cupcake Tutorial!
We'd love to see photos of your Father's Day Cupcakes so make sure you send us a Tweet, tag us in Instagram or post on our Facebook page!
If all of the above seems like too much hard work, please take a look at our Father's Day Cupcake Gift Boxes. We have 3 great designs to choose from, you'll get the same great smile from your dad, great tasting cupcakes and a lot less work! We deliver our cupcake boxes across the UK and they come beautifully gift wrapped. Click the link to take a peek.
Corporate Cupcakes & Personalised Cupcake Gifts
Do you need an idea for a birthday gift? When not send your loved ones a box of our delicious personalised cupcakes?
Choose a ready made Occasions Cupcakes design, personalise the cupcakes with names or upload photos and write your own messages using our Design Your Own Cupcakes tool.
We also provide Corporate Logo Cupcakes for businesses large and small. Get in touch for more information, we're always happy to talk cupcakes.


Comments (0)
There are no comments for this article. Be the first one to leave a message!